
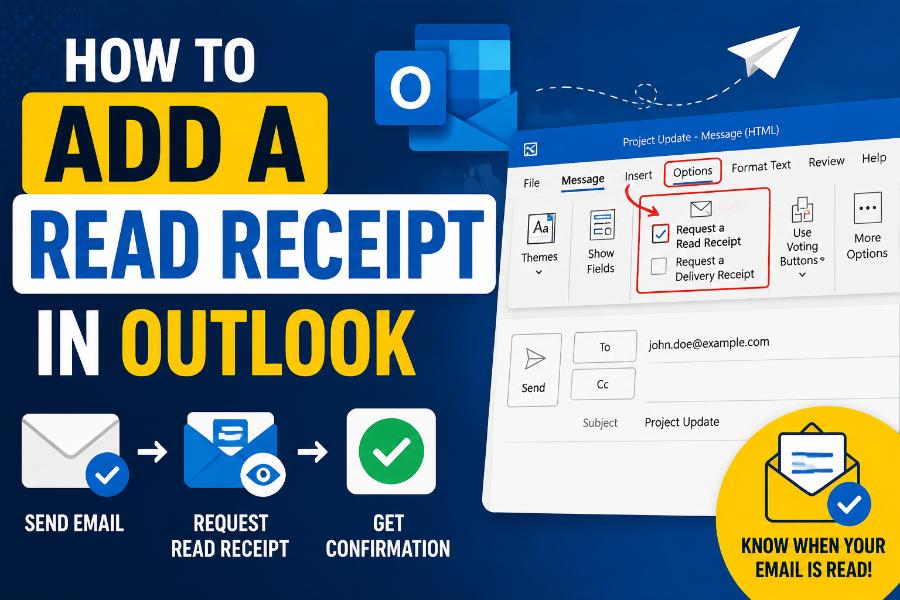
Learning how to add a read receipt in Outlook can be useful when you send an important proposal, deadline notice, contract update, support response, or business message and want confirmation that the email was opened. Outlook supports read receipts in several versions, but the exact steps depend on whether you use new Outlook for Windows, classic Outlook, Outlook on the web, Outlook.com, or Outlook for Mac.
The basic process is simple: compose a message, open the Options area, and select Request a Read Receipt before sending. However, a read receipt is only a request. Microsoft states that recipients can decline to send one, some email programs do not support receipts, and there is no way to force a receipt to be returned. A read receipt also confirms that the message was opened, not that the recipient understood, accepted, or acted on its contents.
This guide covers the current steps for each Outlook version, explains the difference between read and delivery receipts, shows how to change response settings, and helps troubleshoot missing options.
What Is a Read Receipt in Outlook?
A read receipt is an automated email notification that may be sent back to the sender when the recipient opens a message. It can include the recipient, message subject, and the date and time the message was marked as read or opened, depending on the mail system.
Microsoft distinguishes a read receipt from a delivery receipt. A delivery receipt confirms that the message reached the recipient’s mailbox or email server. It does not prove that the person opened it. A read receipt indicates that the message was opened, but it still does not prove that the person carefully read the content.
Both options can be useful in business communication, but neither should be treated as legally conclusive proof. Email clients, organizational policies, privacy settings, mobile apps, aliases, forwarding rules, and recipient choices can all affect whether a receipt is returned.
How to Add a Read Receipt in New Outlook for Windows
Microsoft’s current support instructions for new Outlook use the Options tab in the compose window.
Steps for a single message
- Open new Outlook and select New mail.
- Add the recipient, subject, and message.
- Select the Options tab on the ribbon.
- In the Tracking section, select Request a Read Receipt.
- Select Request a Delivery Receipt too if you also want server-delivery confirmation.
- Send the email.
If the receipt choices are not visible directly under Options, select More Options at the right side of the ribbon and choose the receipt option there.
The request is attached only to that message. When the recipient opens it, their email system may send the receipt automatically, ask for approval, or decline to send anything.
How to Add a Read Receipt in Classic Outlook for Windows
Classic Outlook offers per-message tracking and settings that can request receipts more broadly.
Request a read receipt for one email
- Open classic Outlook.
- Select New Email.
- In the new message window, select the Options tab.
- In the Tracking group, check Request a Read Receipt.
- Optionally check Request a Delivery Receipt.
- Compose and send the message.
This is usually the best method because it limits receipt requests to messages that genuinely need confirmation.
Request receipts for all sent messages
Classic Outlook also provides a global tracking setting:
- Select File.
- Select Options.
- Select Mail.
- Scroll to the Tracking section.
- Check Read receipt confirming the recipient viewed the message.
- Check the delivery receipt option too if desired.
- Select OK.
Microsoft recommends considering receipts only for individual important messages rather than every email. Frequent receipt prompts can frustrate recipients and make them less likely to approve requests.
Request a receipt from the Reading Pane compose view
When composing in the Reading Pane, the ribbon may look different. Microsoft documents a route through the Message tab and Message Options. Open the message options dialog, then select the desired receipt under voting and tracking options.
How to Request a Read Receipt in Outlook on the Web
Outlook on the web is generally the browser-based Outlook experience for work or school accounts using Microsoft 365 or Exchange.
- Sign in to Outlook on the web.
- Select New mail.
- Compose the message.
- Select the Options tab on the ribbon.
- In Tracking, select Request a Read Receipt.
- Select a delivery receipt too if needed.
- Send the message.
If Tracking is not visible, select More Options at the end of the ribbon. Microsoft also provides similar instructions in its Outlook-on-the-web read-receipt guidance: open the message options and choose a read receipt, a delivery receipt, or both.
Organizational administrators can influence availability and behavior. If the setting is absent in a managed account, contact the Microsoft 365 or Exchange administrator.
Can You Request a Read Receipt in Outlook.com?
Outlook.com is the personal consumer email service used with addresses such as Outlook.com and Hotmail.com. Microsoft currently states that users cannot request a read receipt directly in the Outlook.com web interface. However, an Outlook.com account used through Outlook for Windows may be able to request receipts by following the new Outlook or classic Outlook steps.
This distinction explains why two people using Microsoft email may see different options. One may be using Outlook on the web with a work account, while the other is using the Outlook.com website with a personal Microsoft account.
Outlook.com users can still choose how to respond when someone else requests a read receipt. Microsoft places those preferences under Settings, Mail, and Message handling.
How to Add a Read Receipt in Outlook for Mac
The interface depends on the Outlook for Mac version.
For current Outlook for Mac, Microsoft documents this basic method:
- Compose a new message.
- Select Receipts.
- Select Read Receipt.
- Send the message.
If the Receipts button is not visible, customize the toolbar and add it. In some Outlook for Mac versions, the route appears under Options, Request Receipts, and Request a Read Receipt.
A delivery notification may be available from the same Receipts menu. As with Windows, recipient and server settings determine whether the notification comes back.
Read Receipt vs. Delivery Receipt
The two options answer different questions.
Delivery receipt
A delivery receipt indicates that the recipient’s email system accepted the message into a mailbox or server. It does not show that a person opened it. Delivery confirmation may fail when messages cross certain external systems, so the absence of a delivery receipt does not always mean the email failed.
Read receipt
A read receipt indicates that the message was opened or marked as read in a way that triggered the receipt process. The recipient may be able to refuse the request. Some clients may mark a message as read through a preview pane or synchronization behavior even if the person did not review the whole message.
For important communication, a delivery receipt can confirm technical arrival while a read receipt may provide an additional signal of opening. Neither replaces direct confirmation from the recipient.
How to Change Your Outlook Read-Receipt Response Settings
Outlook also lets users choose what happens when they receive a message that requests a receipt.
New Outlook and Outlook on the web
- Open Settings.
- Select Mail.
- Select Message handling.
- Find Read receipts.
- Choose the preferred response behavior.
Available wording may include always sending a response, asking before sending, or never sending one, depending on the account and version.
Classic Outlook
- Select File.
- Select Options.
- Select Mail.
- Scroll to Tracking.
- Choose how Outlook should respond to read-receipt requests.
Organizations may enforce a setting through Exchange or Microsoft 365 policies. A user may not be able to override an administrator-controlled rule.
How to View and Track Receipt Responses
Read and delivery receipts normally arrive in the Inbox as separate messages. In classic Outlook, Microsoft also provides a Tracking view for the original sent message.
To check it:
- Open Sent Items.
- Open the original message.
- Select the Message tab.
- In the Show group, select Tracking.
Microsoft notes that Tracking may not appear until at least one receipt has been received. It may also take several minutes after the first receipt arrives before the Tracking button becomes available.
For a message sent to multiple recipients, the tracking view may show which people returned receipts. External recipients may not appear because their systems declined or did not support the request.
Why You Might Not Receive a Read Receipt
A missing receipt does not necessarily mean the email was ignored. Common reasons include:
- The recipient declined the request
- The recipient’s email application does not support read receipts
- The receiving organization blocks external receipts
- The message was read on a device or client that did not send one
- The recipient viewed only a notification or preview
- The email was forwarded to another mailbox
- The message went to a group, alias, shared mailbox, or automated system
- A security gateway altered or removed the receipt request
- The recipient has not opened the message
- The receipt is delayed or filtered into another folder
Microsoft explicitly states that there is no way to force a recipient to return a read receipt. Treat the feature as optional confirmation, not guaranteed tracking.
Why the Read Receipt Option Is Missing
First, identify the Outlook version. New Outlook and classic Outlook place the setting in different locations. Microsoft includes a “What version of Outlook do I have?” resource because interface differences are a common source of confusion.
Next, check whether you are using Outlook.com in a browser. Personal Outlook.com currently does not offer a direct request option in the web interface. Try the Outlook desktop application if your account supports it.
For managed work or school accounts, the administrator may have disabled or restricted receipts. Ask the Microsoft 365 administrator whether message tracking is available.
On Mac, add the Receipts command to the toolbar if it is hidden. In any version, expand More Options because a narrow window can collapse ribbon commands.
Finally, update Outlook. Old builds, simplified ribbons, or customized toolbars can change where the command appears.
Can You Automatically Request Read Receipts for Every Email?
Classic Outlook provides a setting under File, Options, Mail, and Tracking that can request receipts for sent messages. However, using it for every email is rarely the best communication practice.
Recipients may see repeated prompts and choose never to send receipts. Automated requests can also appear intrusive, especially for routine messages, newsletters, internal updates, or casual conversations. They create extra notification traffic and do not guarantee useful evidence.
Use read receipts selectively for time-sensitive, high-importance messages where opening confirmation has a legitimate purpose. For recurring workflows, consider project-management tools, support ticket systems, e-signature platforms, or shared task systems that provide clearer status records.
Professional Etiquette for Read Receipts
A read receipt is most appropriate when the recipient reasonably expects accountability. Examples include a deadline change, formal approval request, critical service update, or document that needs prompt review.
Use a clear subject line and explain the requested action in the email. Instead of relying only on the receipt, add a line such as, “Please reply by July 15 to confirm that you received and reviewed the schedule.” A direct response is more meaningful than an automated opening signal.
Avoid using receipts to monitor every interaction or pressure recipients. Respect organizational policies, privacy expectations, and local laws. For legal notices or contractual communications, seek professional advice about approved delivery methods rather than assuming an Outlook receipt is sufficient proof.
Read Receipts and Privacy
Read receipts reveal information about when a message was opened, so many email systems let recipients decide whether to send them. Organizations may disable external receipts to prevent information leakage. A receipt could reveal working hours, travel, time zones, or the presence of an active mailbox.
Senders should request receipts only when there is a legitimate business need. Recipients should follow workplace policy when responding. Administrators should balance operational requirements with privacy and security.
A read receipt is generally more transparent than hidden tracking technology because the request may be displayed to the recipient. Still, transparency depends on the mail client and administrative settings.
Troubleshooting Checklist
If Outlook read receipts are not working, check the following:
- Confirm whether you use new Outlook, classic Outlook, Outlook on the web, Outlook.com, or Mac
- Look under Options, Tracking, or More Options
- Verify that the account is supported
- Update Outlook to the latest available build
- Check administrator policies for work or school accounts
- Send a test message to another account you control
- Check Inbox, Junk Email, and focused/other tabs for returned receipts
- Remember that external recipients can decline
- Do not assume a missing receipt proves the message was unread
Testing between two accounts within the same organization can help determine whether the feature is working internally. External behavior may still vary.
Frequently Asked Questions
Can I force an Outlook read receipt?
No. Microsoft says recipients can decline, some email programs do not support the feature, and there is no way to force a receipt.
Does a read receipt mean the person read the whole email?
No. It generally means the message was opened or marked as read. It does not prove comprehension or action.
Can I request both read and delivery receipts?
Yes, supported Outlook versions allow both options. Delivery and reading confirmation serve different purposes.
Why can I not see read receipts in Outlook.com?
The personal Outlook.com web interface currently does not let users request them directly. Microsoft notes that Outlook.com messages sent through Outlook for Windows may use the desktop receipt options.
Can I add a read receipt after sending an email?
No. The request must be attached before the message is sent. You can send a follow-up message asking the recipient to confirm receipt.
Do read receipts work with Gmail recipients?
They may work in some configurations, but the result depends on the recipient’s account type, client, administrator settings, and decision. Personal Gmail does not provide the same native request feature available to eligible Google Workspace accounts.
Final Thoughts
To add a read receipt in Outlook, compose the message, open Options, locate Tracking, and select Request a Read Receipt before sending. In classic Outlook, the setting can be applied to a single email or configured more broadly. Outlook on the web for work and school accounts uses a similar Options workflow, while the personal Outlook.com web interface currently does not offer direct read-receipt requests.
Use the feature selectively and remember its limits. A returned receipt is a signal that the email was opened, not proof that it was read carefully or accepted. For genuinely important communication, combine the receipt request with a clear call to action and ask the recipient to reply with confirmation.